How To Make Your Own Natural Cat Litter At Home: A Complete DIY Guide
I’ve always believed that taking care of our furry friends should be as eco-friendly and economical as possible. That’s why I decided to explore how to make your own natural cat litter at home – a journey that not only reduces waste but also provides a chemical-free environment for your beloved cat. In this guide, I’ll share my personal experience, the best materials to use, step-by-step processes, smart maintenance tips, and even some troubleshooting advice. Let’s dive into this eco-friendly adventure together!
Understanding the Benefits of Making Your Own Natural Cat Litter
When I first considered making my own cat litter, I was motivated by the need to cut down on plastic waste and harsh chemicals found in many commercial products. Embracing homemade options has numerous benefits:
- Cost-Effective: Creating your own litter from readily available, inexpensive materials can significantly reduce your monthly pet care expenses.
- Eco-Friendly: Using recycled and natural ingredients minimizes your ecological footprint and reduces landfill waste.
- Healthier for Your Cat: Homemade litter is chemical-free, reducing the risk of allergies and respiratory issues common in some commercial litters.
- Customizable: You can modify your mixture to perfectly suit your cat’s preferences and your household environment.
- Simple to Make: With just a few ingredients and tools, you can create natural cat litter quickly and efficiently.
This DIY approach has allowed me to experiment with several recipes, each time learning more about what truly works for my cat. In this article, you’ll discover various methods and strategies to find the best match for your unique needs, all while keeping things simple and effective.
How To Make Your Own Natural Cat Litter At Home: Natural Litter Ingredients
The key to crafting an effective cat litter is choosing ingredients that are naturally absorbent and odor-controlling. Here are some common household materials I’ve tested that work wonderfully:
- Newspaper Shreds: Easily accessible and excellent for absorbing moisture.
- Wood Shavings: Cedar and pine shavings naturally repel insects and absorb moisture, but ensure they’re untreated.
- Dried Corn Kernels: These provide a biodegradable base perfect for clumping.
- Wheat or Grass Seeds: They offer natural odor control and absorbency.
- Recycled Paper Products: Beyond newspaper, soak up more than just moisture.
These ingredients are all eco-friendly and present a great alternative to clay-based litters that often harm the environment during production. By using these natural materials, you’re taking a stand against harmful strip mining processes and promoting sustainability.
How To Make Your Own Natural Cat Litter At Home: Newspaper-Based Litter Method Explained
One of the simplest and most cost-effective ways to create natural cat litter at home involves using shredded newspaper. I remember when I first tried this method, I was amazed at how well it worked both for absorbing moisture and neutralizing odors. Here’s a detailed process:
Step-by-Step Newspaper Litter Preparation
- Gather Your Materials: Collect several days’ worth of newspapers from your local newspaper or recycled boxes from packages.
- Shred the Paper: Use a paper shredder or scissors to cut the newspapers into thin, uniform strips. This ensures even absorption and textural consistency.
- Soak and Clean: Soak the shreds in warm water mixed with a small amount of mild dish soap. This step is important to remove any ink residues that might be harmful to your cat.
- Rinse and Drain: Drain the water and rinse the shredded paper thoroughly. It’s crucial to remove all soap residue.
- Dry Thoroughly: Lay out the paper strips on a large surface and allow them to dry completely. Make sure you spread them out to avoid any clumping during the drying process.
- Add Baking Soda: Once dry, sprinkle a thin layer of baking soda over the paper to help neutralize odors even further.
This simple method creates a soft, biodegradable litter that’s gentle on the cat’s paws. I found that incorporating baking soda not only improved odor management but also added a fresh scent without the need for synthetic chemicals.
How To Make Your Own Natural Cat Litter At Home: Using Wood Shavings for Superior Absorption
Another popular method I explored involved using untreated wood shavings, such as cedar and pine. Wood shavings are naturally absorbent and repel pests – a bonus when you’re looking to improve the litter’s performance naturally. However, it’s crucial to choose kiln-dried, untreated shavings to avoid any harmful chemical exposure.
Wood Shavings Litter Preparation Steps
- Source Clean, Untreated Wood Shavings: Ensure the wood shavings are free from chemical treatments.
- Sift and Sort: Remove any large chunks to achieve a finer texture that’s gentle on your cat’s paws.
- Enhance with Baking Soda: Mix the shavings with a small amount of baking soda. This not only helps with moisture absorption but also with odor control.
- Store Properly: Keep your prepared wood shavings in a dry, sealed container until ready to use.
This method works particularly well for cat owners looking for a natural scent and superior moisture absorption. The process reminds me of simple yard work; every step is straightforward, and the ingredients are easy to source.
How To Make Your Own Natural Cat Litter At Home: Exploring Corn and Wheat-Based Alternatives
If you’re searching for alternatives that are both biodegradable and effective in odor management, corn and wheat-based substrates might be the solution. Using dried corn kernels or wheat seeds not only supports a natural cycle but also creates an absorbent litter environment.
Steps for Creating Corn or Wheat-Based Litter
- Grind to a Fine Consistency: Use a food processor or grain mill to grind the kernels or seeds into a fine powder. This helps prevent tracking outside the litter box.
- Mix with Baking Soda: Add baking soda to the powder for enhanced odor control. It’s a simple ingredient that goes a long way.
- Sift to Remove Larger Particles: To ensure a homogeneous texture, sift the mixture, removing any larger, undesirable fragments.
- Store in an Airtight Container: Keep your freshly prepared litter in a sealed container to maintain its quality; this also helps prevent moisture accumulation.
Using these grain-based options has not only saved me money but also made me feel proud that I’m supporting agricultural byproducts and reducing waste. The mixture is light, natural, and easy to customize based on your cat’s preferences.
How To Make Your Own Natural Cat Litter At Home: Essential Odor Control Techniques
Odor control is a major concern for any cat owner. While homemade litter options are natural and effective, incorporating natural deodorizers makes a big difference. Over time, I discovered that combining a few extra ingredients significantly improves performance.
Key Ingredients For Odor Management
- Baking Soda: The tried and true ingredient that neutralizes odors without harmful chemicals.
- Dried Lavender: Adds a gentle, natural fragrance to keep your home smelling fresh.
- Ground Activated Charcoal: Provides excellent odor absorption while remaining non-toxic.
- Diatomaceous Earth: Works wonders for moisture control and adds a mineral boost to your mixing process.
My secret blend often consists of a base material (newspaper, wood shavings, or corn-based powders) with a consistent sprinkle of baking soda and a dash of activated charcoal. It’s really about getting the right balance so that the litter remains effective for longer periods between changes.
How To Make Your Own Natural Cat Litter At Home: Safety Considerations and Testing
One of the most important parts of the process is ensuring that your cat is comfortable and safe with the new litter. Not all cats may immediately take to a new substrate, so it’s essential to observe their behavior closely.
Safety Tips to Keep in Mind
- Introduce Gradually: Begin by mixing the homemade litter with your cat’s current litter. Slowly increase the proportion of homemade litter over several days.
- Monitor for Allergies: Keep an eye on any signs of irritation, respiratory issues, or unusual behavior. Every cat reacts differently.
- Select Non-Toxic, Untreated Ingredients: Avoid any materials with chemical treatments or artificial fragrances.
- Check Texture: Ensure the consistency is fine and free of large, sharp fragments that might harm your cat’s sensitive paws.
Once you start experimenting, always keep a close watch on how your cat interacts with the new litter. My experience has taught me that a little patience and observation go a long way toward finding the perfect formula.
How To Make Your Own Natural Cat Litter At Home: Maintenance and Routine Cleaning
Maintaining homemade litter is essential to ensure it remains effective and hygienic. Unlike many commercial litters, natural substitutes often require a bit more attention. I’ve developed a simple routine that helps keep the litter box fresh and clean.
Daily Maintenance Practices
- Scoop Waste Daily: Remove all solid waste each day using a dedicated scoop (metal or sturdy plastic).
- Stir the Litter: Occasional stirring helps redistribute the clean material and exposes any hidden damp spots to air.
- Monitor Moisture: Check for clumping or clumps that might need a spot clean – add a light sprinkling of baking soda if necessary.
- Observe Odors: If a noticeable odor begins to develop, consider a deeper clean or complete replacement of the litter.
This regular upkeep not only keeps the litter box exuding freshness, but also ensures that my cat’s designated bathroom remains a comfortable and hygienic space.
How To Make Your Own Natural Cat Litter At Home: Practical Tips on Storage and Ingredient Management
After preparing your homemade litter, proper storage is key to maintaining its freshness and effectiveness. Here’s what has worked for me:
Storing Raw Materials
- Use Airtight Containers: Store your base ingredients (like shredded paper, wood shavings, or ground grains) in sealed, moisture-proof containers.
- Keep in a Cool, Dry Place: Choose a storage area away from direct sunlight and excess moisture to prevent mold and degradation.
- Organize by Type: Keep different materials separate to easily blend the right proportions when needed.
Ensuring proper storage not only extends the lifecycle of your ingredients but also saves you money and effort in the long run.
Additional Maintenance and Deep Cleaning Strategies
Between complete litter changes, cleaning the litter box thoroughly is a must. I always make it a point to do a deep clean about once a week:
- Empty the Litter Box Completely: Remove all remnants of old litter from the box.
- Wash with Pet-Safe Detergent: Use a mild, pet-friendly cleaner or even a mix of white vinegar and water to sanitize the box.
- Rinse and Dry: Rinse thoroughly to remove all cleaning solution, and allow the box to dry completely before refilling.
This deep cleaning cycle is essential for maintaining a healthy environment for your cat.
How To Make Your Own Natural Cat Litter At Home: Comparing with Commercial Options
Many pet owners initially hesitate to switch to homemade cat litter because they worry it won’t perform as well as commercial blends. From my experience, here’s a comparison:
Pros of Homemade Natural Litter
- Eco-Friendly: Made from recycled or renewable sources rather than environmentally damaging clay.
- Cost Savings: Significantly less expensive in the long run.
- Customizable Texture and Odor: Adjust the recipe based on your cat’s sensitivities and your home’s smell.
- Fewer Chemicals: Reducing the risk of irritation and respiratory issues.
Considerations Compared to Commercial Litters
- Maintenance: Homemade litters require more frequent cleaning and total replacement every 5-7 days.
- Transition Period: Some cats might need extra time to adapt to a new texture and scent.
- Experimentation: You might need to tweak the mix several times to meet your specific needs.
The extra effort is well worth it when you consider the significant savings in cost and the environmental benefits of ditching plastic packaging and harmful chemicals.
How To Make Your Own Natural Cat Litter At Home: Real-Life Examples and Stories
I recall a time when my neighbor, Sarah, decided to create her own natural cat litter using newspaper shreds and wood shavings. Initially skeptical, her cat eventually embraced the change after a gradual transition. Sarah’s story inspires me to keep experimenting with natural ingredients and to share experiences with other pet owners. Stories like hers remind us that adapting to sustainable practices may require small adjustments initially, but the benefits are long-lasting and impactful.
In fact, experimenting with your own recipes can be both fun and rewarding. For example, on a rainy afternoon, while reading an article about eco-friendly pet products, I decided to try mixing a bit of ground corn with shredded recycled paper. The end result was a light, clumping litter that worked perfectly during the monsoon season when humidity peaked. Every small detail counts – from the texture of the litter to the way it absorbs moisture – and tweaking these details can create big benefits in the daily routine.
How To Make Your Own Natural Cat Litter At Home: Internal Resources for Eco-Friendly Pet Care
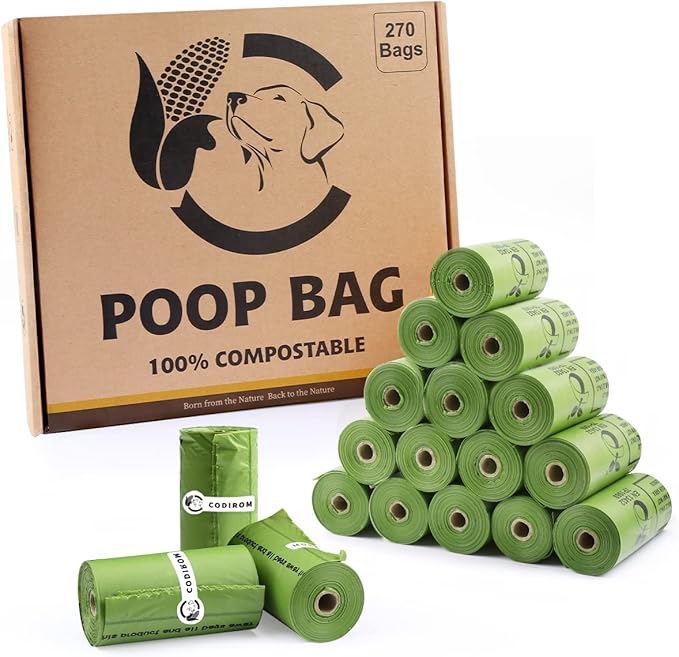
As I journeyed deeper into sustainable pet care, I also learned about other aspects of eco-friendly pet waste management. For instance, I found it useful to read up on how to properly dispose of biodegradable pet waste bags as part of a comprehensive approach. Similarly, I discovered that bioplastics are a better choice for pet waste bags, adding another layer to my green efforts.
For a deeper understanding of sustainable pet care, I often reference this article on the importance of using eco-friendly poop bags and other helpful tips found in tips for switching to sustainable dog waste bags. These resources have been instrumental in shaping a broader eco-friendly mindset not just for cat litter but for all aspects of pet care.
How To Make Your Own Natural Cat Litter At Home: Frequently Asked Questions
Why should I consider making my own natural cat litter at home?
Because it’s cost-effective, eco-friendly, and chemical-free. By creating your own litter, you can customize the blend to suit your cat’s needs and reduce your environmental footprint.
What common ingredients work best for homemade litter?
Many people, including me, have found that newspaper shreds, untreated wood shavings, dried corn kernels, and ground grains like wheat or barley offer excellent absorbency and odor control.
How do I control odors naturally?
Incorporating baking soda, dried lavender, activated charcoal, or diatomaceous earth into your litter mix can drastically improve odor management.
Is it safe for my cat to use homemade litter?
Yes, as long as you ensure that all ingredients are non-toxic and free from sharp edges or chemical treatments. Introduce the new litter gradually to avoid any digestive or respiratory issues.
How often should I change the homemade litter?
Typically, full replacement every 5-7 days is recommended. Daily scooping is essential and helps keep the litter box fresh and clean.
How To Make Your Own Natural Cat Litter At Home: Final Thoughts and Encouragement
Switching to homemade cat litter is more than just a cost-saving measure—it’s a conscious choice that contributes positively to environmental sustainability. I’ve seen firsthand how simple changes in pet care routines can lead to significant benefits for both our homes and the planet. Every time you make your own litter, you’re reducing waste, avoiding harmful chemicals, and setting an example for others to follow.
This journey is about meeting your cat’s needs while embracing a greener lifestyle. It may take a little trial and error to discover the perfect blend for your household, but the results are well worth the effort. Remember, sustainability is a gradual process, and every step counts.
Whether you opt for the newspaper shred method, wood shavings, or a grain-based mix, the key is consistency and attention to detail. Monitor your cat’s behavior, adjust your recipe as needed, and eventually, you’ll find the ideal natural cat litter that works for your cat and your home.
Embracing this DIY approach gives you the chance to tell your own eco-friendly story, one litter box at a time. I encourage you to experiment boldly, share your successes and challenges, and inspire others to pursue sustainable pet care practices in their own homes.
Every batch of homemade litter you create is a testament to your commitment to a healthier world—not just for your pet but for all living things. Let’s continue to innovate, adapt, and make the world a better place, one small, responsible step at a time.
Happy crafting, and here’s to a cleaner, greener future for our pets and our planet!