How To Safely Store Homemade Pet Food To Prevent Spoilage: An In-Depth Guide
I’ve spent years researching and testing methods to safely store homemade pet food, and I’ve learned that proper storage is critical for ensuring that the meals you prepare remain nutritious and safe for your furry friends. In this comprehensive guide, I merge veterinary-backed studies, sustainability research, and real-world pet care practices to help you master the art of food storage. Today, I’m going to walk you through the science of spoilage, best practices for cooling and container selection, temperature management, and even meal planning to minimize waste. All of this is geared towards one main goal: learning how to safely store homemade pet food to prevent spoilage.
Understanding the Science Behind Spoilage
Before we jump into techniques, let’s talk about what spoilage really means. Spoilage occurs when food is stored in conditions that allow bacteria, mold, and other microorganisms to multiply. These contaminants can affect the taste, nutritional value, and safety of your pet’s food. Several factors contribute to spoilage:
- Exposure to Air: Air brings moisture and oxygen, which can speed up oxidation.
- Temperature: Higher temperatures provide ideal conditions for bacterial growth.
- Moisture Levels: Excess moisture can lead to bacterial and fungal growth.
- Time: The longer food is stored, the higher the chance it will spoil.
Understanding these basic principles lays the groundwork for safe practices when storing your homemade pet food.
Cooling Homemade Pet Food Properly
One of the most critical steps in this process is cooling your pet food correctly. Hot food placed directly in the refrigerator can not only raise the overall temperature inside the appliance but can also become a breeding ground for bacteria. Here’s how I ensure that my homemade pet food cools quickly and safely:
Step-by-Step Instructions for Quick Cooling
- Divide and Conquer: Transfer the food into shallow containers. This increases surface area, permitting faster cooling.
- Use Cooling Racks: Place your containers on cooling racks or leave them uncovered on a clean surface to facilitate rapid heat dispersal.
- Occasional Stirring: Stirring the food intermittently helps to equalize temperatures throughout the container, ensuring even cooling.
- Ice Bath: For larger quantities, consider placing the container in an ice bath (make sure the container is sealed) to reduce the temperature more swiftly.
These methods are especially useful if you’ve prepared a large batch of food for your pet and need to safely bring it down to room temperature before refrigeration.
Choosing the Ideal Storage Containers
When it comes to preventing spoilage, the right container makes all the difference. The type of container you choose affects the longevity and safety of homemade pet food by restricting access to air, moisture, and contamination. Here are some container options to consider:
Stainless Steel Containers
Stainless steel containers provide an excellent option thanks to their durability and non-porous nature. They are resistant to bacteria and are easy to clean. I have observed that stainless steel does not hold onto food odors, keeping the taste and freshness intact.
High-Quality Plastic Bins
Food-grade, BPA-free plastic bins are lightweight and budget-friendly options. When selecting plastic bins, make sure they come with airtight seals. This prevents the entry of air and moisture that could accelerate spoilage. Some key tips include:
- Right Size: Choose containers suited to your portion size needs.
- Labeling: Always label with the preparation date to track freshness.
- Stackability: The ability to stack neatly can help save storage space.
Glass Containers
Glass containers offer a non-toxic and eco-friendly alternative. They are inert and don’t retain odors or stains, and they can be visually appealing. Although they are heavier and more fragile than other options, careful handling can mitigate these downsides. Glass is perfect for those who appreciate an elegant, transparent look in their kitchen or pet food storage area.
Vacuum-Sealed Bags
Vacuum-sealed bags excel at removing excess air, which is critical in preventing oxidation and freezer burn for longer-term storage. When using these bags:
- Cool Completely: Always ensure the food is cooled down completely before sealing it in a vacuum bag.
- Portion Control: Divide your food into single-serving sizes to avoid exposing the entire batch each time you remove a portion.
- Remove Excess Air: Use a vacuum sealer to extract as much air as possible.
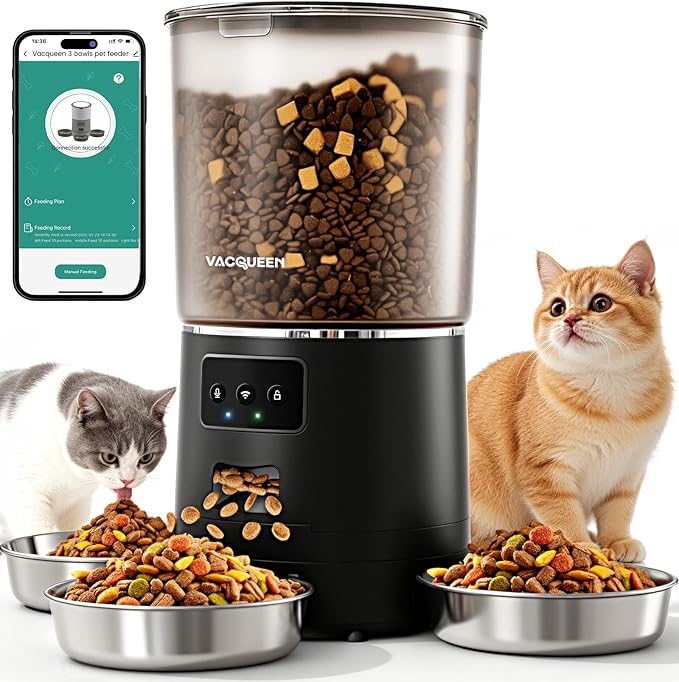
Tech-Enhanced Smart Containers
If you’re a tech-savvy pet parent, smart storage containers might be a breakthrough for you. These containers integrate with your smartphone, allowing you to monitor food levels, control portion sizes, and even dispense food at scheduled times. They help minimize the risk of spoilage by ensuring that your storage conditions are always ideal.
Refrigeration Practices for Maximum Freshness
Proper refrigeration is one of the most important strategies for learning how to safely store homemade pet food to prevent spoilage. Refrigeration slows the growth of harmful bacteria, preserving both the flavor and nutritional content of your pet’s meals.
Refrigeration Step-by-Step Instructions
- Main Compartment: Always store food in the main compartment instead of the fridge door, where temperatures can be inconsistent.
- Temperature Check: Keep your refrigerator at a constant 40°F (4°C) or below. Investing in a refrigerator thermometer is a small price to pay for safety.
- Follow FIFO: Use the “first in, first out” method. Consume older food before the more recently stored portions.
- Short-Term Storage: Homemade pet food is best used within three to four days of preparation when refrigerated.
These practices are key in maintaining food quality and preventing any contamination that might arise from prolonged storage.
Freezing Homemade Pet Food for Long-Term Storage
When you prepare more food than your pet needs for a few days, freezing is an exceptional strategy. Freezing halts the spoilage process, maintaining the food’s nutritional value for months. Here’s how you can safely freeze your homemade pet food:
Step-by-Step Freezing Instructions
- Cool Completely: Allow the food to reach room temperature before freezing to prevent temperature shock inside the freezer.
- Divide into Portions: Portion the food into pre-meal servings using containers or freezer bags. This way, you only defrost what is needed.
- Airtight Seals: Squeeze out as much air as possible when using freezer bags to prevent freezer burn.
- Labeling: Mark containers with the date of freezing so you can track their age.
Freezing is a great way to ensure you always have a backup supply of healthy meals without worrying about rapid spoilage.
Thawing Frozen Pet Food: Safe Practices
Thawing your pet’s frozen food safely is as important as the freezing process. Improper thawing can create hot spots in the food, which may harbor bacteria. Below are some proven methods for safe thawing:
How To Thaw Pet Food Safely
- Refrigerator Thawing: Place frozen food in the refrigerator overnight. It allows the food to thaw gradually and safely.
- Microwave Method: If you’re short on time, the microwave can be used; however, ensure you stir the food frequently to avoid uneven heating and hot spots.
- Never Refreeze: Once food has been thawed, do not refreeze as it increases the risk of bacteria growth and nutrient loss.
Following these guidelines boosts the safety and quality of the pet meals you serve every day.
Maintaining Proper Temperature Control
Maintaining proper temperature control is fundamental when it comes to storing homemade pet food. Keeping the food at the right temperature ensures that its nutritional value remains intact and that spoilage is minimized. Here’s why temperature control is indispensable:
Understanding Safe Temperature Ranges for Pet Food
It’s crucial to remember these temperature benchmarks:
- Refrigeration: Maintain a temperature between 32°F (0°C) and 40°F (4°C) to slow bacterial growth.
- Freezing: Store food at 0°F (-18°C) or below to safely suspend spoilage processes.
By adhering to these temperature standards, you create an environment that is inhospitable to bacteria and other harmful microorganisms.
Quick Cooling Techniques for Optimal Temperature Management
After cooking, rapid cooling of your homemade pet food is essential. Here’s a practical, step-by-step approach:
- Smaller Containers: Divide large batches into smaller portions right after cooking.
- Ice Baths: Place the container in a larger tub filled with ice to speed up the cooling process.
- Constant Stirring: Regularly stir the pet food during the cooling phase to allow even temperature distribution.
These techniques not only secure the food’s health benefits but also minimize unwanted bacterial proliferation due to uneven cooling.
Containers and Their Impact on Food Quality
The containers you choose for storage play an integral role in learning how to safely store homemade pet food to prevent spoilage. Using the right container can safeguard your pet’s meals from oxidation, loss of nutrients, and bacterial contamination.
Airtight Containers: Your First Line of Defense
Airtight containers help maintain the integrity of pet food by sealing out air and moisture. Here are several container options with pros and cons:
- Stainless Steel Containers
- Pros: Durable, non-porous, and easy to clean.
- Cons: Heavier and may be more expensive than plastic options.
- BPA-Free Plastic Bins
- Pros: Lightweight, affordable, and often stackable.
- Cons: May not be as durable as stainless steel over time.
- Glass Containers
- Pros: Non-toxic, eco-friendly, and do not retain odors.
- Cons: Fragile and heavier than other alternatives.
- Vacuum-Sealed Bags
- Pros: Excellent for long-term storage and reducing exposure to air.
- Cons: Requires additional equipment (vacuum sealer) and careful handling during thawing.
- Smart Containers
- Pros: Integrate modern technology to monitor food levels and dispense portions automatically.
- Cons: Higher cost and dependency on technology for routine operations.
In one of my recent projects, I even linked my interest in sustainable low-waste pet care with one great article on eco-friendly pet care practices—helping me to dive deeper into container choices that support environmental sustainability.
Real-World Testing: A Case Study with Max, the 5-Year-Old Golden Retriever
Let me share a real-world example that demonstrates the effectiveness of proper food storage. My neighbor’s 5-year-old Golden Retriever, Max, had been experiencing mild gastrointestinal issues due to inconsistently stored homemade meals. By switching to a new storage method using airtight glass containers and implementing a strict temperature control routine, Max’s digestive issues decreased noticeably. The change not only kept his food fresher for longer periods, but his overall mood and energy level improved as well.
This case shows that a simple change in storage (using glass containers with secure lids and quick cooling methods) can lead to significant improvements in pet health. Max’s improved digestion and energy levels were a clear sign that paying attention to how you safely store homemade pet food to prevent spoilage has tangible benefits.
Meal Planning to Minimize Waste and Enhance Food Quality
Efficient meal planning is another crucial part in preventing food spoilage while simultaneously reducing waste. By carefully planning your pet’s meals, you not only ensure freshness but also help the environment through waste minimization. Here’s how I approach meal planning:
Creating a Meal Calendar
A meal calendar is a fantastic tool that offers a clear roadmap for the week. It enables you to:
- Plan Favorites: Incorporate meals that meet your pet’s nutritional needs and that they love.
- Use Seasonal Ingredients: Seasonal produce is not only cost-effective but often tastes better and lasts longer.
- Theme Nights: Consider designating specific days for different meal themes like “Meatless Mondays” or “Tasty Tuesdays” to introduce variety.
Developing a Smart Grocery List
An effective grocery list is central to reducing waste. Before heading out, ask yourself:
- How many meals will I prepare this week?
- What ingredients do I already have at home?
- Which items are essential to prevent last-minute shopping trips?
By keeping your list categorized by store sections, you eliminate unnecessary purchases and ensure nothing goes to waste.
Innovative Ways to Use Leftovers
Leftovers don’t have to be a burden. Instead, get creative with:
- Reinventing Meals: Think of turning leftover chicken into a delightful stew or stir-fry. Small adjustments can create a completely new meal.
- Freezing Portions: Freeze excess food in individual serving sizes, ensuring that nothing spoils.
- Scheduling a Leftover Night: Dedicate one day a week to finish off any remaining food, redistributing portions so you maximize every ingredient.
Controlling Portions for Improved Freshness
One of the best ways to enhance the lifespan of your pet food is by cooking only what is needed. I follow these simple steps:
- Measure Ingredients: Use a measuring cup to ensure precise portions and avoid over-preparation.
- Use Smaller Containers: Store food in single-serving portions so that you only defrost or serve what is necessary.
- Monitor Consumption: Keep a diary to track how much your pet typically eats, fine-tuning portions as needed.
This meticulous approach minimizes waste while ensuring that your pet’s meals remain at their freshest and most nutritious.
Incorporating Sustainability Into Pet Food Storage
It’s no secret that sustainable practices are not only good for the environment, but they also contribute to the overall health of your pet. When I first started my research into homemade pet food storage, I discovered that eco-friendly practices help reduce my pet’s exposure to toxic chemicals and non-biodegradable materials. Here are some actionable tips to incorporate sustainability into your routine:
Eco-Friendly Container Choices
Before purchasing storage containers, consider ones that boast biodegradable or non-toxic materials. For example:
- Look for containers marked as BPA-free and made of recycled plastics or glass.
- Choose stainless steel options, which are durable and have a minimal environmental footprint over their lifetime.
Buying products with eco-labels can be a win-win: you’re safeguarding your pet’s health and also contributing to a healthier planet.
Low-Waste Meal Prep
Meal planning and smart grocery shopping are key components of a low-waste lifestyle. By preparing your pet’s food in bulk and storing it properly, you reduce the frequency of wasteful single-use packaging. This not only helps sustain a cleaner environment but also saves you money. I encourage you to read more about sustainable low waste pet care through eco-friendly pet care practices—a resource that has helped me refine my own methods.
Safety First: Protecting Your Pet’s Health
Implementing Step-by-Step Instructions for Success
The key to successfully learning how to safely store homemade pet food to prevent spoilage is to develop a routine that covers every aspect—from cooling to storing to meal planning. Below is a consolidated set of step-by-step instructions:
Step-by-Step Storage and Preparation Process
- Cool Down Quickly:
- Transfer hot food into shallow containers.
- Use cooling racks or ice baths for rapid cooling.
- Stir occasionally to even out the temperature.
- Select Appropriate Containers:
- Opt for airtight, food-grade materials (stainless steel, glass, or BPA-free plastics).
- If freezing, consider vacuum-sealed bags to eliminate air.
- Store at Optimal Temperatures:
- Refrigerate at 40°F (4°C) or lower.
- Freeze at 0°F (-18°C) or below for long-term storage.